
 Lucifer Vol. 4: The Devil At Heart
Dan Watters, writer; Max Fiumara, Sebastian Fiumara & Brian Level, artists; Dave McCaig & Dee Cunniffe, colorists
DC Vertigo, 2021
Watters and company bring this chapter in Lucifer’s story to a stylish conclusion. In the process they include a wide range of Sandman characters, making it especially appropriate to appear under the Vertigo banner. The previous collection had concluded with a previously unpublished chapter, which would have been monthly issue #19. This one entirely skips the monthly publication schedule: the contents would have been #20-24.
Lucifer had spent the entire previous arc trying to avoid a prophecy. His failure left confusion it its wake, especially among Remiel and Duma (the angels currently in charge of Hell) and the human Beverly Walsh (currently the possessor of Lucifer’s heart). Lucifer’s entire history has been about the pursuit of free will, and his latest failure drives him to visit the garden of Destiny of the Endless, where he makes good on his threat to entirely erase himself from the pages of the Book of Destiny. The goal is to make it as if he never existed, and the repercussions ripple through human history. It seems that humanity needs the devil in unimaginable ways.
Lucifer’s farewell letter reaches Mazikeen in the Necropolis Letharge, and includes a historical tale of his meeting with the painter Francisco Goya. The consequences of his nonexistence extends even to the Heavenly Host: in the absence of the devil, even god seems absent. In short, if the Devil did not exist it would be necessary to invent him (a twist on Voltaire’s famous statement about God). It could be argued that this is yet another reset, but it’s such a fun read–and so well illustrated by Level, the Fiumaras and McCaig, who really get the classic Vertigo atmosphere right–that it is a satisfying conclusion to this chapter in Lucifer’s saga. He’ll be back.
******************************
 John Constantine: Hellblazer Vol. 2: The Best Version of You
Simon Spurrier, writer; Aaron Campbell & Matías Bergara, artists; Jordie Bellaire, colors
DC Black Label, 2021
Constantine is haunted by the (possibly) future version of himself throughout this second collection. He follows a series of strange events, which at first seem unrelated. A mermaid, and the twisted fishmonger who uses her for his own devices; a member of the royal family who births a unicorn, with no concept of the repercussions; and a giant beast that may be a secret source of the British leadership’s power.
But are they all illusions? In the end John does what he always does: outsmarts the opponents who are trying to steal his soul. He does it by making his soul too soiled to be a prize. And he may not even be breathing in the end: but he’s won, and the game goes on. This latest installment in the Hellblazer story has all of the hallmarks of the classic stories, with all of the supernatural atmosphere (visually and narratively) and the moral ambiguity of the protagonist. Like Lucifer, he’ll be back.
******************************
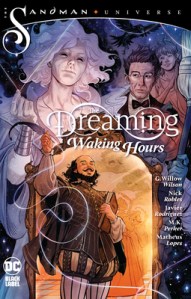 The Dreaming: Waking Hours
G. Willow Wilson, writer; Nick Robles, Javier Rodriguez & M.K. Perker, artists; Matheus Lopes & Javier Rodriguez, colorists
DC Black Label, 2021
This big 12-issue miniseries has the feeling of a conclusion, like a capstone to the entire Sandman Universe project (I say this before reading the Locke & Key/Sandman crossover, but it is hard to imagine a crossover having the same impact). There are several artists who worked on it, but the bulk of it was illustrated by Nick Robles, colored by Matheus Lopes, and all of the issues were lettered by Simon Bowland (who did not get a cover credit, but did a consistent and at times creative job).
The first five-issue arc, “The Bard and the Bard,” stars Lindy, a Shakespearian scholar working on her doctorate while also raising a newborn baby. She has a recurring nightmare about being stuck in William Shakespeare’s house in Stratford-upon-Avon. It has always been an endless, empty structure until one night when she encounters a nightmare named Ruin. A disaster happens: Ruin wakens in the real world (with Lindy’s baby), while Lindy awakes in Shakespeare’s house, which is populated by Will, his wife Anne Hathaway, and other characters alleged to have actually written Shakespeare’s works (including Kit Marlowe). Ruin is seeking the mortal man he fell in love with while visiting him with nightmares, and Lindy agrees to judge who among the household is the real Shakespeare (perhaps allowing them all to leave the house). The story also finds Dream and Lucien the librarian visiting the Box of Nightmares in search of clues to Ruin’s disappearance from the Dreaming. Ruin and Lindy are both new characters, but the tale has all of the classic signs of the Dreaming: Shakespeare played a major recurring role in the original Sandman series.
Dream gave Ruin freedom to roam freely in the mortal world, and the two-part “Intermezzo” (with art in a simpler, brighter style by Javier Rodrigquez) shows him exploring, while his mortal love Benedict leaves the priesthood to do the same. The magician Heather (of the famous Burgess family involved in the Sandman from the very beginning) had tangled with the faerie Puck in the first arc, and he returns to take his revenge for her summoning spell. On the advice of John Constantine she calls for help to defend her, and summons Matthew the raven and Goldie the cute baby gargoyle from the Dreaming–not exactly the powerful beings she was aiming for, but a lovely callback to Sandman history. A second summoning attempt brings Auberon, the former faerie king, who has been dethroned (along with queen Titania) by Nuala, one of her handmaidens (and another character from the past). He raises her curse, and in return she promises to help get his throne back.
Which leads into the final five-part arc “The Faerie Queen.” Heather leads Ruin and the fallen angel Jophiel into Faerie, which she expects to be a cake walk. Instead they find Faerie in ruins after a war, and are quickly enchanted by Unseelie faeries to forget their mission. When they meet Queen Nuala it is clear that she is a figurehead: not really in charge, but beholden to the Unseelie who helped her gain the throne. In the end Heather manages to keep her promise. But she has one final act to perform: she compels Dream to allow Ruin and Benedict to stay together, despite his misgivings. A happy ending for them, with consequences that are likely to remain unexplored.
******************************

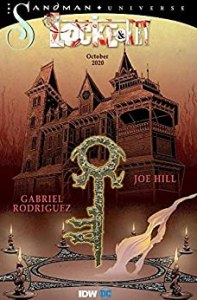
Locke & Key/Sandman: Hell & Gone
Joe Hill, writer; Gabriel Rodriguez, artist
DC/IDW, 2020-2021
This is an unlikely crossover on the face of it, but it makes more and more sense as it goes. It makes its connections slowly.
SPOILER WARNING: I was unable to discuss the story without giving away significant plot points, so consider yourself warned.
Hell & Gone #0
Is a kind of prequel. It reprints “Open the Moon,” a one-shot featuring Locke & Key patriarch Chamberlin Locke, whose Moon Key will set in motion events more far-ranging than he could have imagined. This story begins in 1912, when the key is created to help the sick child Ian. He is taken to the moon by balloon as though the world is a stage and passes gently to the next world. It is not a story that seems central to the Locke & Key world–The Moon Key is not even included in the “Guide To The Known Keys” that is also reproduced here–but it has a significant impact on the events of the crossover. The necessary setup for the Sandman connection is presented in the first eight pages of “Sleep Of The Just,” the first issue of Sandman. It depicts Roderick Burgess’ attempt to magically bind Death. Of course he captures Morpheus (Dream) instead, but declares it to have been a very profitable evening’s work. He strips Morpheus of his helm, ruby, and bag of sand, which will figure importantly in the story that follows.
Hell & Gone #1
In true Sandman fashion, this is a quest story, which begins here. The year is 1927, and Mary Locke has travelled to Wych Cross, England to see Roderick Burgess. More specifically, she wants an audience with the “eternal and dangerous” entity he has trapped in the basement. Her brother Jack has been in Hell since killing himself ten years ago, and Mary wants help going there and bringing his soul out. Morpheus does not speak to her, but sketches a clue in sand on the inside of the globe which holds him captive. She returns to offer Burgess’ young son the Anywhere Key to go on an adventure in the American West, in return for the magical helm, ruby, and sand bag.
After falling asleep she wakes in the Dreaming. The first thing she does is dig up Abel, who has been buried alive by his brother Cain. She runs to the House of Mystery, where Cain mistakes her for Morpheus, since she is wearing his helm. She encounters Brute and Glob on her way to the library of dreams, where she is greeted by the Corinthian.
Hell & Gone #2
The Corinthian tries to convince her that he is Lucien the librarian, but she sees through him. Joined by Lucien and Fiddler’s Green, she employs Morpheus’ power objects to send him away. While researching ways to enter Hell Lucien shows her a book with Lucifer’s key to Hell on the cover (along with an incantation that will summon a demonic escort. Mary creates a copy of the key to Hell using the magical whispering iron used for all of the magical keys. Arming herself with magical objects, she summons the demon Etrigan and follows him to Hell’s gates (along with Fiddler’s Green).
Showing the key, she contests Lucifer for dominion over Hell. Since there now appears to be two keys, he proposes a game to decide the question, and she suggests combat. Things look dicey, but she finds a way to create her own exit and leave with Jack and Fiddler’s Green. Employing the Moon Key, she reunites Jack with his late mother and the rest of the family. Summoned to the Silver City, she hands over the Key to Hell. The angels have been waiting for it to eject Lucifer Morningstar from Heaven, sending him to hell–and thus is the paradox of the two keys resolved. Returned to Earth (and the Keyhouse), she is just in time to bid her father goodbye before Death takes him up to the moon in a balloon.
The miniseries is a remarkable feat of storytelling, combining the two worlds in a completely convincing way. If considered canon it provides a glimpse into the state of the Dreaming during Morpheus’ captivity, as well as a deep connection between the two series. As a fan of both of them I thought it was wonderful. It is hard to imagine a longtime Sandman fan who has not read Locke & Key accepting this as a legitimate chapter in the story, though. While there is some background provided (especially in the #0 issue, but also the text summaries that open each issue), a Sandman reader with no prior exposure to Locke & Key would likely feel a little lost. In any case Rodriguez’s artwork deserves special mention. The Sandman characters are as lovingly rendered as if he had created them.

Pingback: Mr. Vertigo Reviews 103: Stray Dogs; Locke & Key – The Golden Age; Karmen | Mr. Vertigo